The Classic Editor is a popular plugin for WordPress that allows users to switch back to the classic editing experience in WordPress. Here’s a step-by-step guide on how to use the Classic Editor in WordPress:
-
Install the Classic Editor Plugin
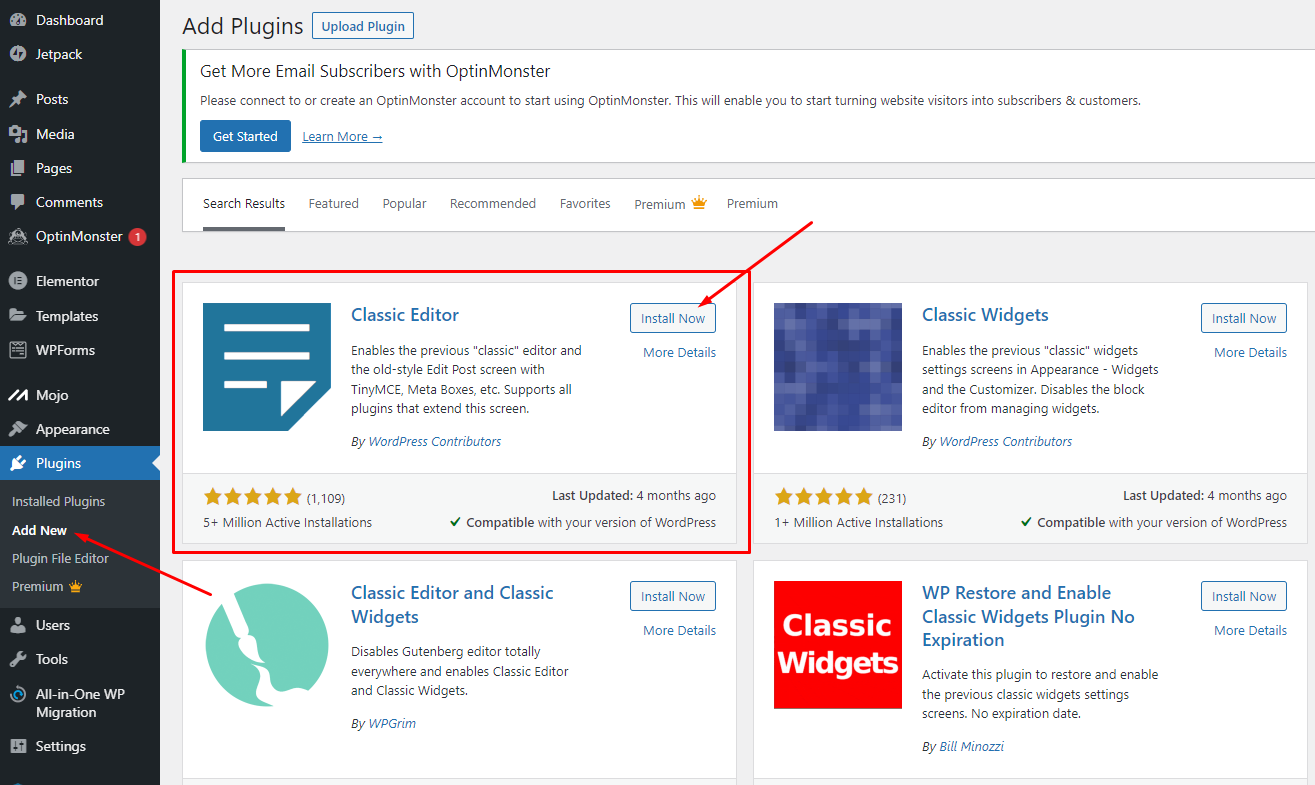
The first step is to install the Classic Editor plugin. You can do this from the WordPress dashboard by going to the “Plugins” section, and clicking on “Add New”. Then, search for “Classic Editor”. When you have found it, click the “Install” button, and then “Activate”.
-
Configure the Classic Editor
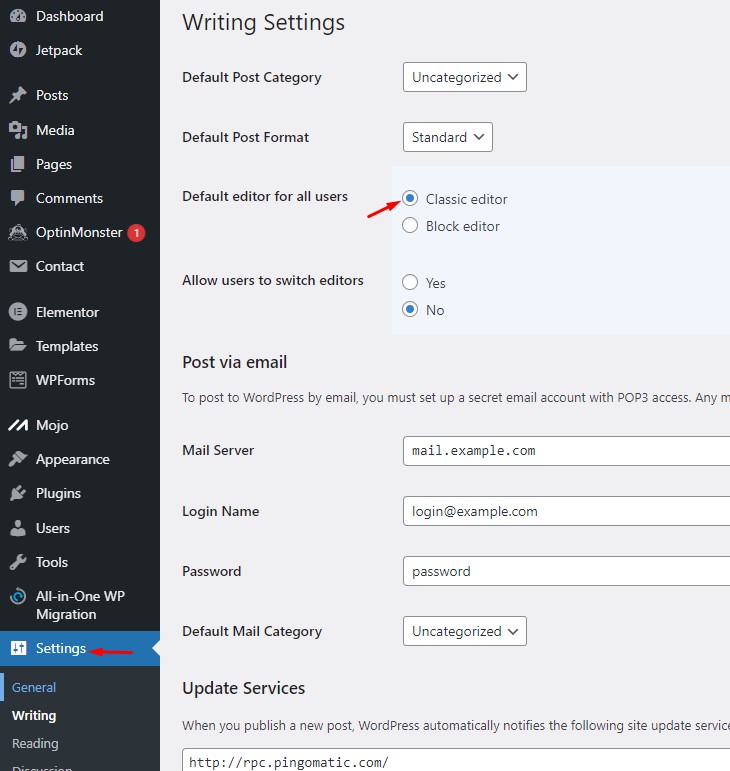
Once the Classic Editor plugin is installed and activated, you can access its settings from the WordPress dashboard under “Settings”. Here, you can choose whether you want to use the Classic Editor as the default editor for all users, or allow users to choose their preferred editor.
-
Use the Classic Editor
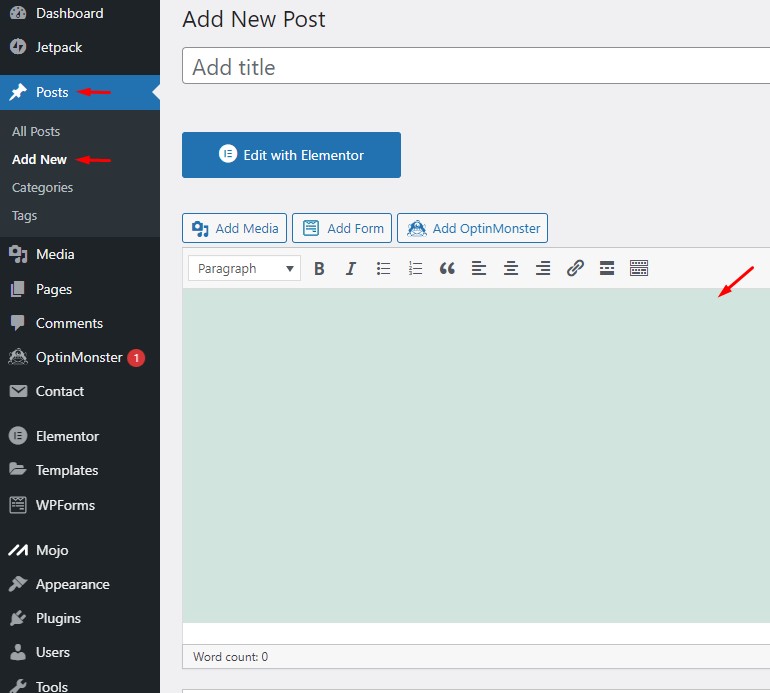
When you want to use the Classic Editor, simply go to the “Posts” or “Pages” section of the WordPress dashboard and click on “Add New” or “Edit”. The Classic Editor will then be loaded, allowing you to edit your content using the classic editing experience.
-
Switch Between the Classic and Block Editor
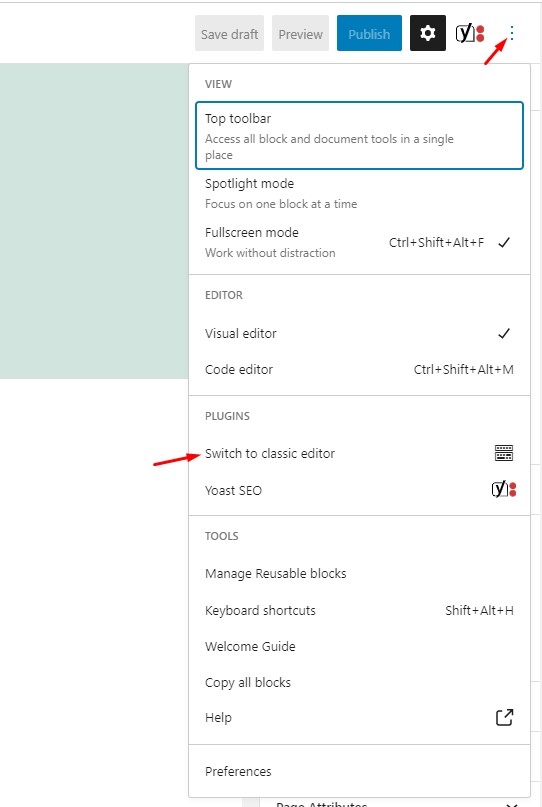
If you want to switch between the Classic Editor and the Block Editor, you can do so from the top right corner of the editor screen. Simply click on the “Switch to Classic Editor” or “Switch to Block Editor” button to switch between the two editors.
-
Save and Publish Your Content
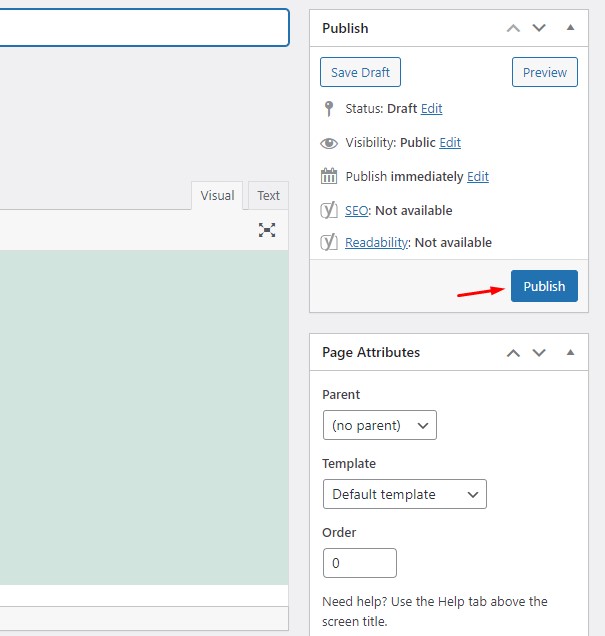
When you have finished editing your content using the Classic Editor, simply click on the “Publish” button to save and publish your changes.
In conclusion, the Classic Editor is a useful plugin for WordPress that allows users to switch back to the classic editing experience. By following these steps, you’ll be able to use the Classic Editor with ease, giving you more control over the editing experience in WordPress.


