A 404 page is a crucial component of any website. It’s the page that appears when a user tries to access a URL that doesn’t exist. By default, WordPress displays a basic 404 page with a message that says “page not found.” However, you can create a custom 404 page that matches your website’s design and branding. In this blog, we’ll show you how to create a custom 404 page using Elementor.
-
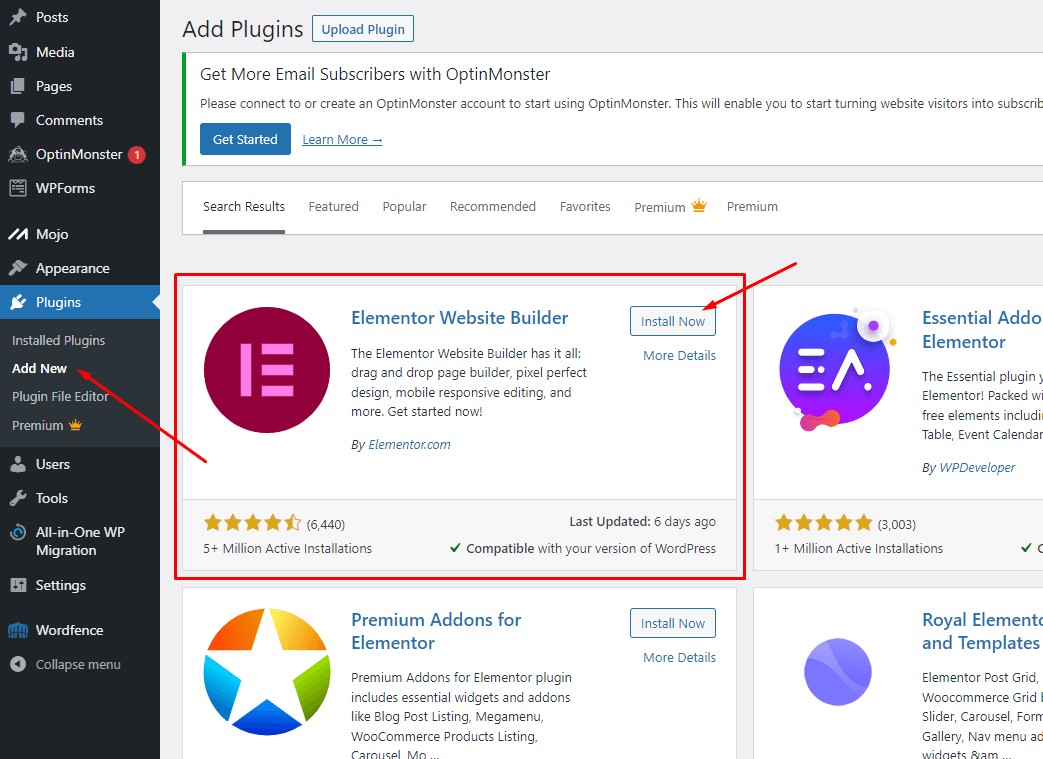
Install and activate the Elementor plugin
To create a custom 404 page with Elementor, you’ll need to install and activate the Elementor plugin on your WordPress site. Elementor is a popular page builder that allows you to create custom pages, posts, and templates without any coding knowledge.

-
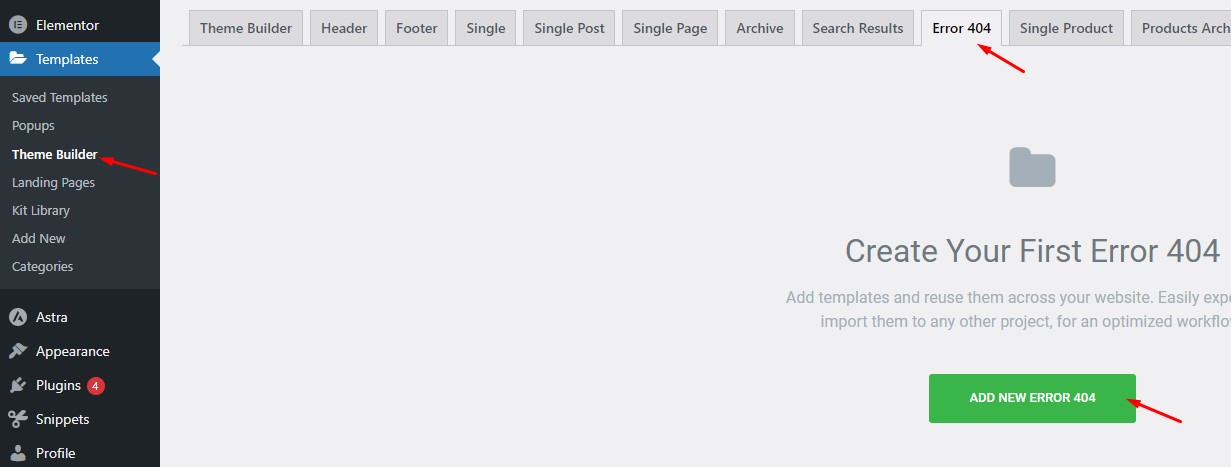
Create a new 404 page template
Once you have the Elementor plugin installed and activated, you can create a new 404 page template. To do this, go to the Elementor Templates section of your WordPress dashboard, and click on the “Add New” button. Select “404 Page” from the list of templates, and give your template a name.

-
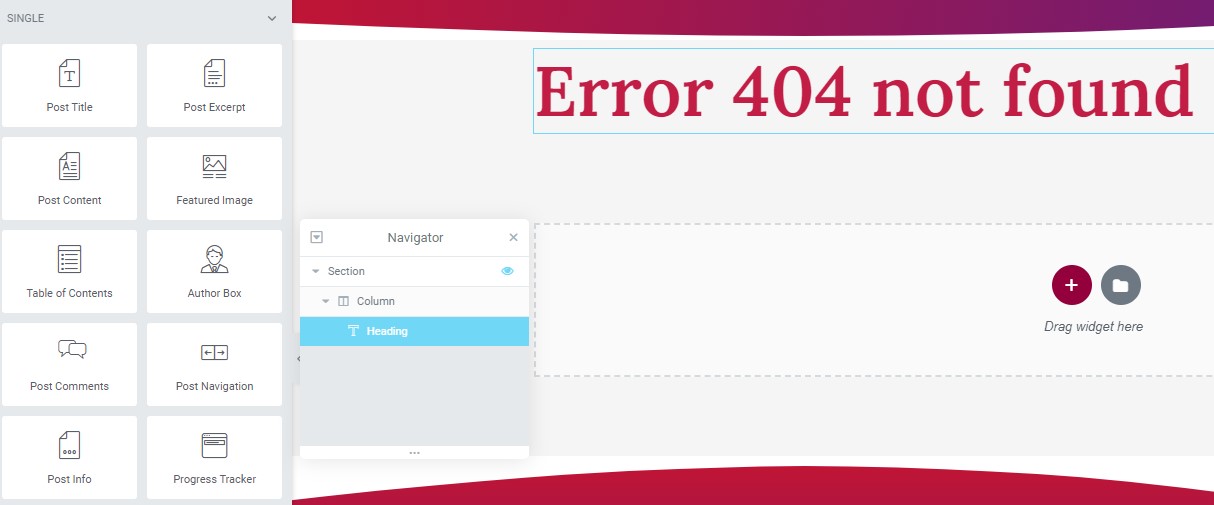
Design your custom 404 page
With your new 404 page template created, you can start designing your custom 404 page. Elementor provides a drag-and-drop interface that makes it easy to add elements, such as text, images, and buttons, to your page. You can also use Elementor’s pre-designed templates and blocks to quickly create a professional-looking 404 page.

-
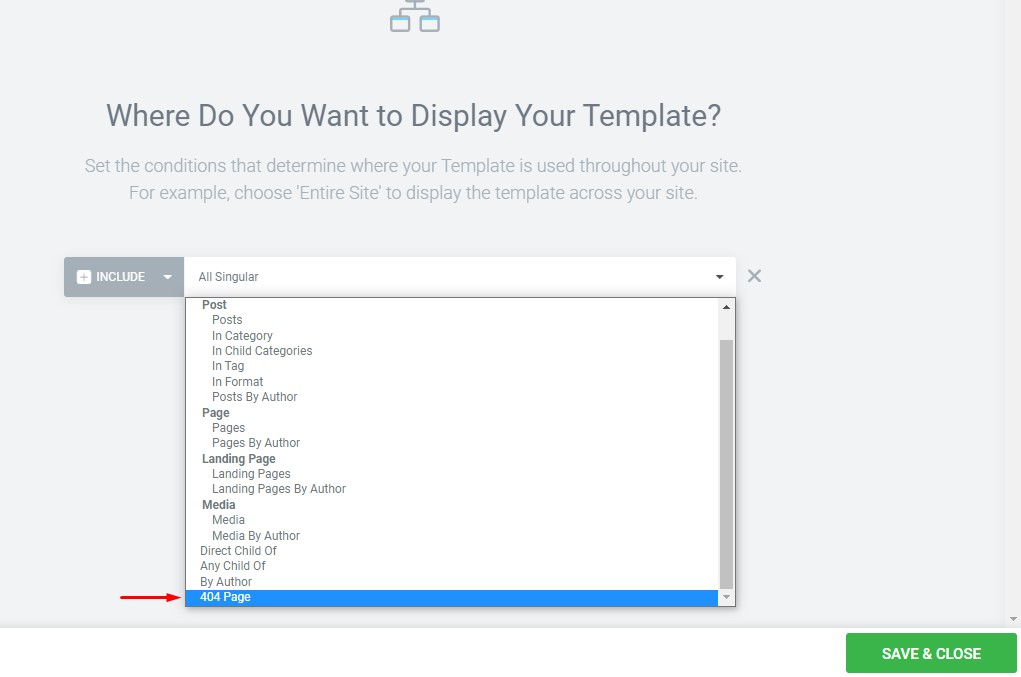
Set your 404 page as the default 404 page for your site
Once you have designed your custom 404 page, you’ll need to set it as the default 404 page for your site. To do this, go to the Reading section of your WordPress dashboard, and select the “404 Page” option. From there, you can select your custom 404 page template as the default 404 page for your site.

-
Preview and publish your custom 404 page
Before you publish your custom 404 page, be sure to preview it to make sure it looks and functions as you intended. If everything looks good, you can publish your custom 404 page, and your visitors will see your new custom 404 page the next time they encounter a broken link on your site.

In conclusion, changing the number of posts shown on your blog pages in WordPress is a simple process that can be done through the WordPress dashboard. By adjusting this setting, you can control the layout and content of your blog pages, making it easier for your users to find the information they need.


