Headers and footers are essential components of any website. They provide a consistent look and feel to your site, making it easy for users to navigate. In this blog, we will show you how to create headers and footers in WordPress using the Elementor page builder.
-
-
Install Elementor
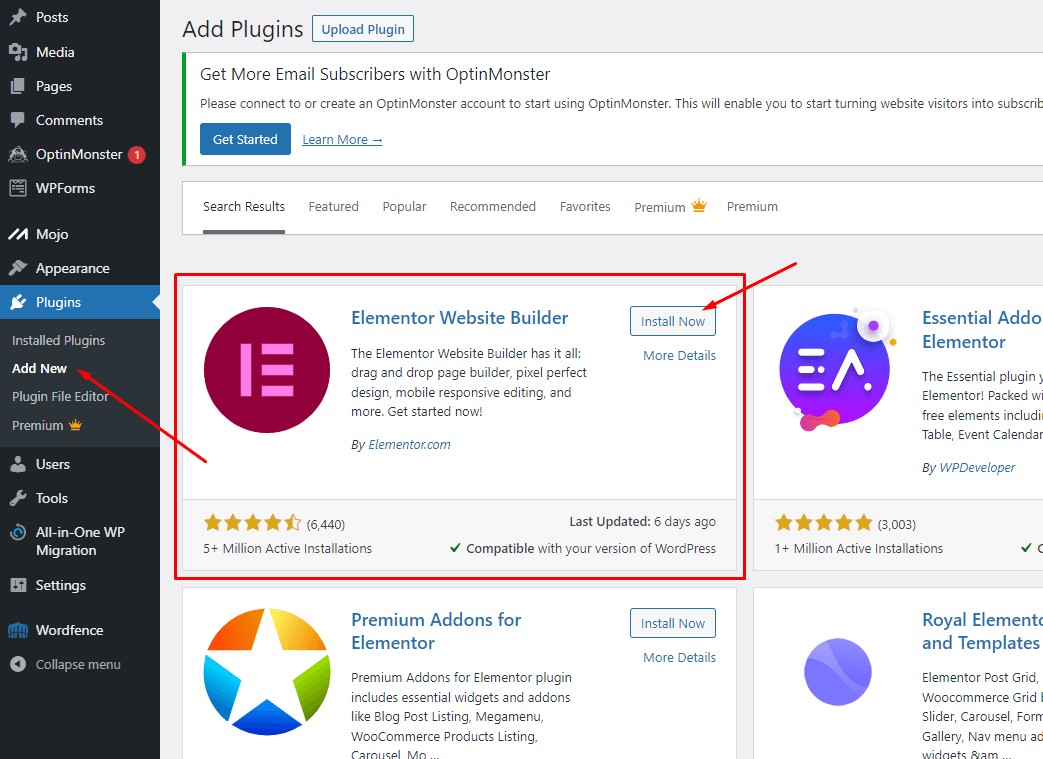
If you haven’t already, you need to install Elementor on your WordPress site. To do this, go to the WordPress plugin repository, search for Elementor, and click on “Install Now.” Once installed, activate the plugin.
-
Create a New Header or Footer Template
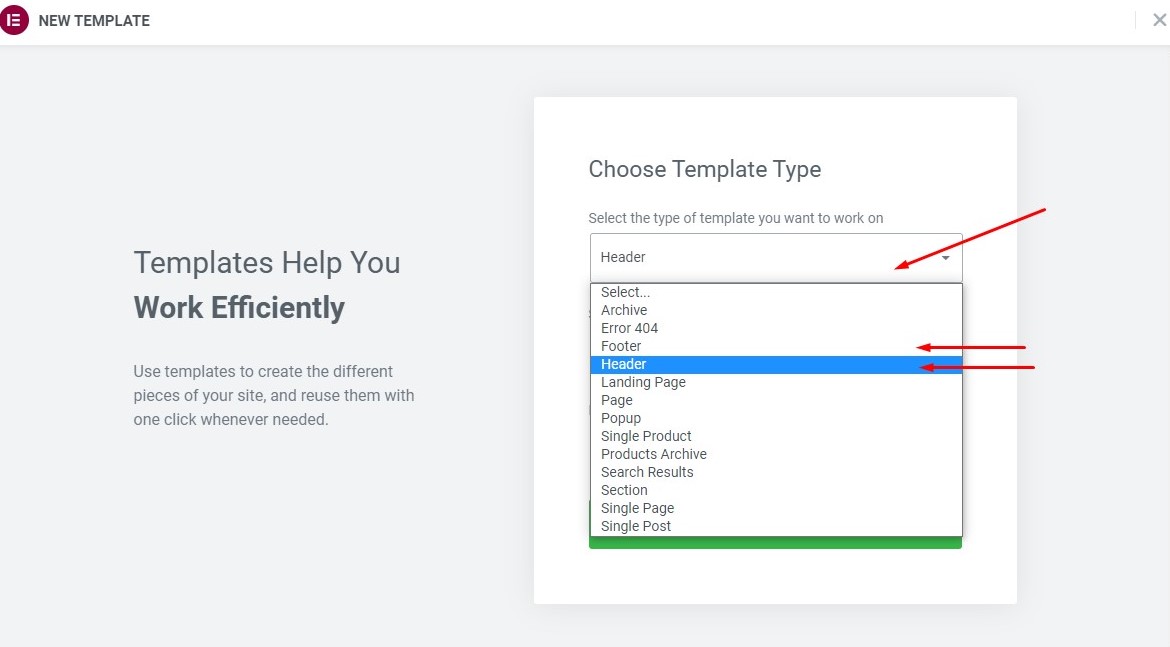
Go to Elementor > My Templates > Add New and select “Header” or “Footer” as the template type. Give your template a name and click on “Create Template.”
-
Design Your Header or Footer
The Elementor editor will open, and you can start designing your header or footer. You can use the Elementor widgets, such as text, image, and menu, to create your header or footer.
-
Set the Header or Footer as the Default for Your Site
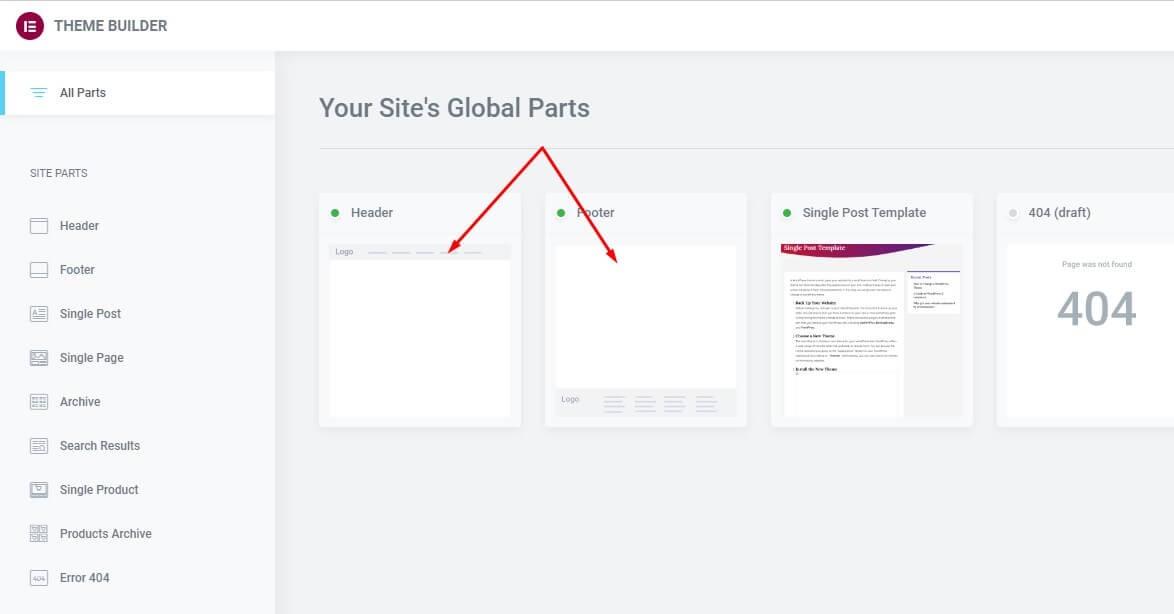
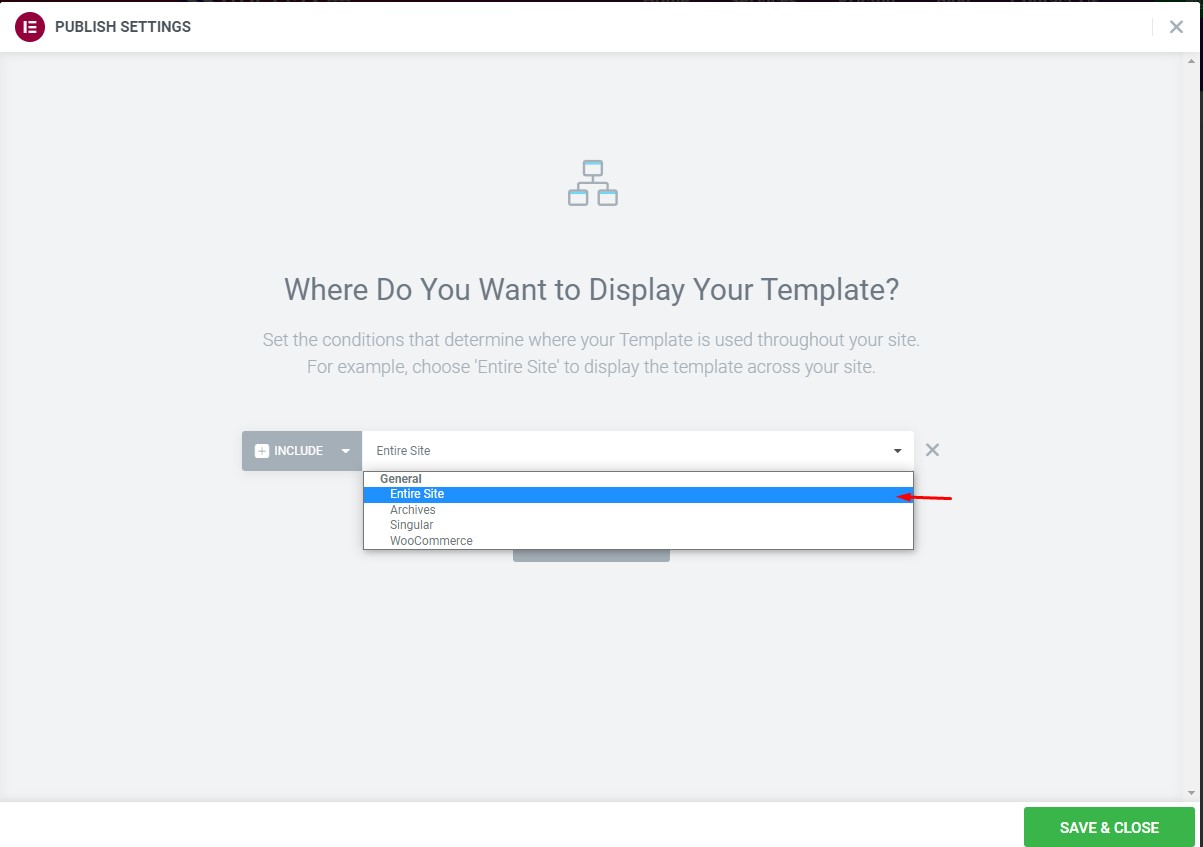
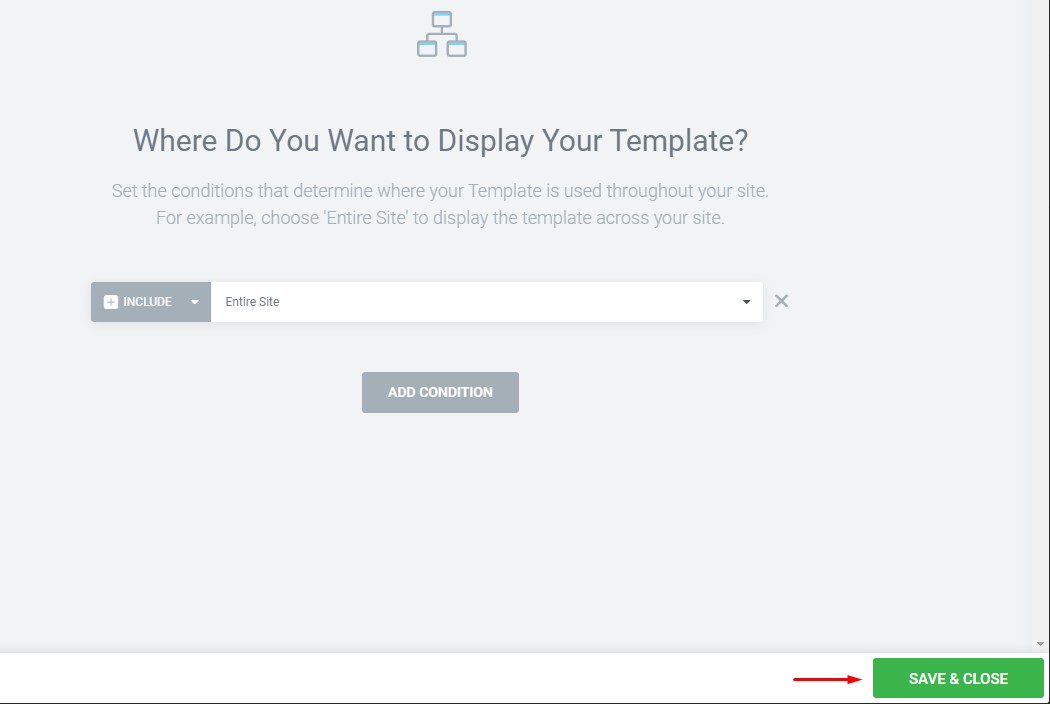
Once you have designed your header or footer, go to Elementor > Theme Builder, select “Header” or “Footer,” and set it as the default for your site. You can also choose to display the header or footer on specific pages or posts.
-
Preview and Publish Your Header or Footer
Preview your header or footer to make sure it looks the way you want it to. When you are ready, click on “Publish” to make your header or footer live on your site.
-
In conclusion, creating headers and footers in WordPress with Elementor is an easy and straightforward process. By using Elementor, you can design professional-looking headers and footers without needing to know any code. Give it a try and see how it can help enhance the look and feel of your website.


