In Elementor, a popular page builder for WordPress, you can control the width of your website’s container to determine how much of the screen is occupied by your content. Setting the container width can help you create a responsive design that looks good on any screen size. In this blog, we’ll show you how to set the container width in Elementor for your WordPress site.
-
-
Log in to your WordPress Dashboard
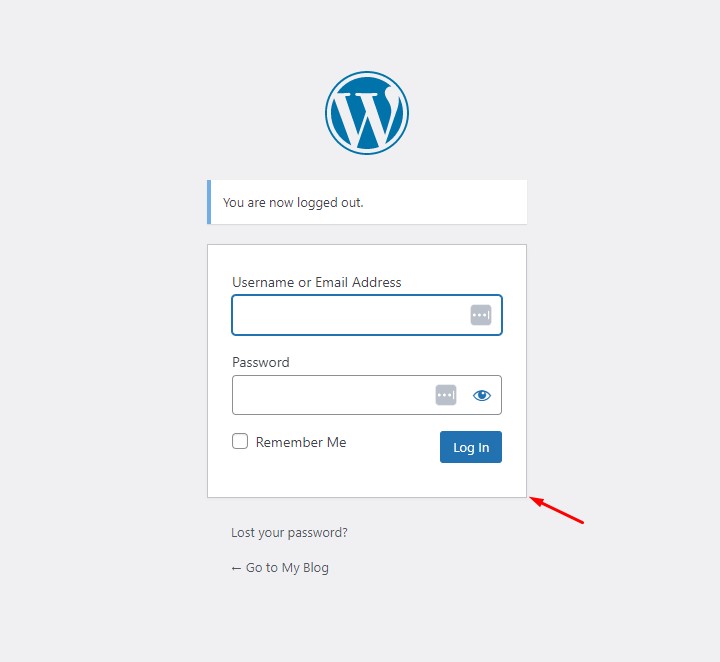
To start, log in to your WordPress dashboard. You can do this by going to your website’s login page and entering your username and password.

-
Go to the Elementor editor
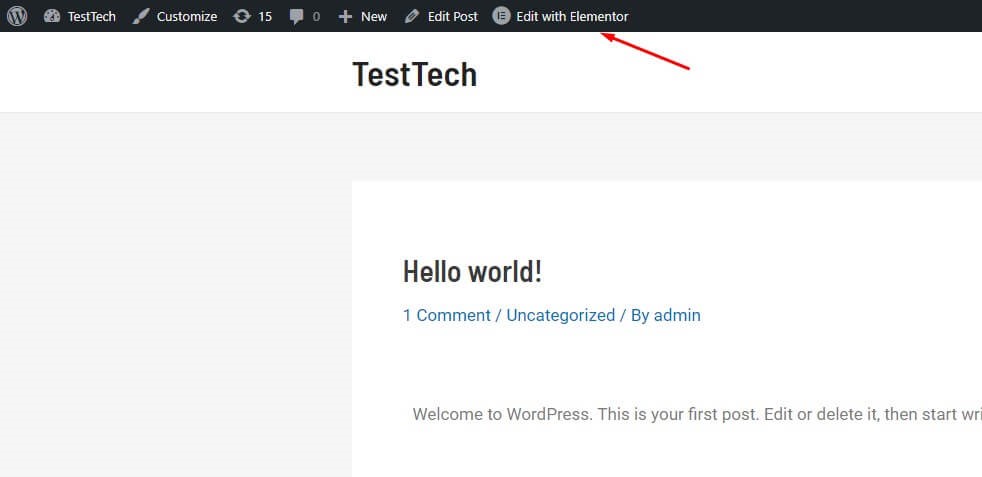
Once you’re logged in, go to the page you want to edit using Elementor. Click on the “Edit with Elementor” button to enter the Elementor editor.

-
Access the page settings
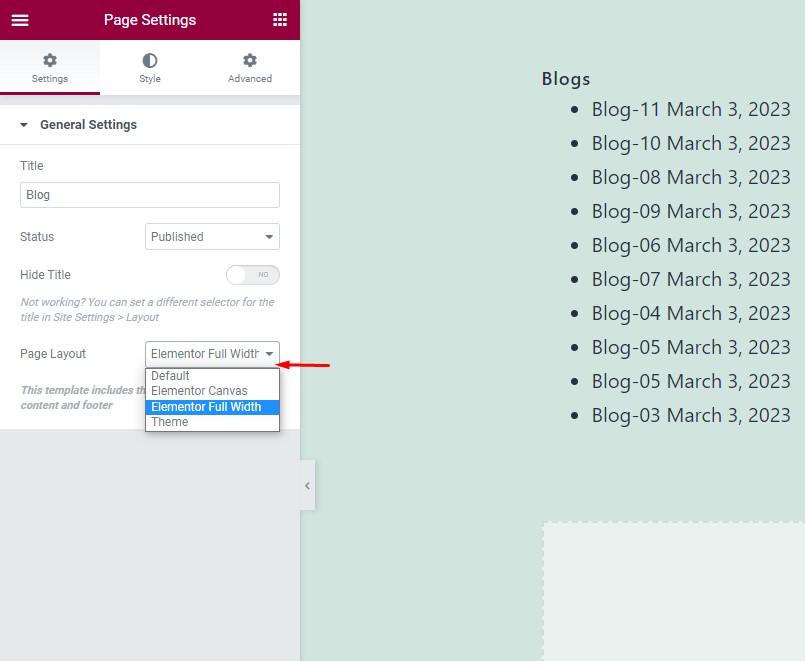
In the Elementor editor, click on the “Settings” icon in the bottom left corner to access the page settings.

-
Set the container width
In the page settings, go to the “Layout” tab and look for the “Container Width” setting. You can set the container width to a fixed width in pixels, a percentage of the screen width, or you can choose the “Full Width” option to make the container span the full width of the screen.

-
Save your changes
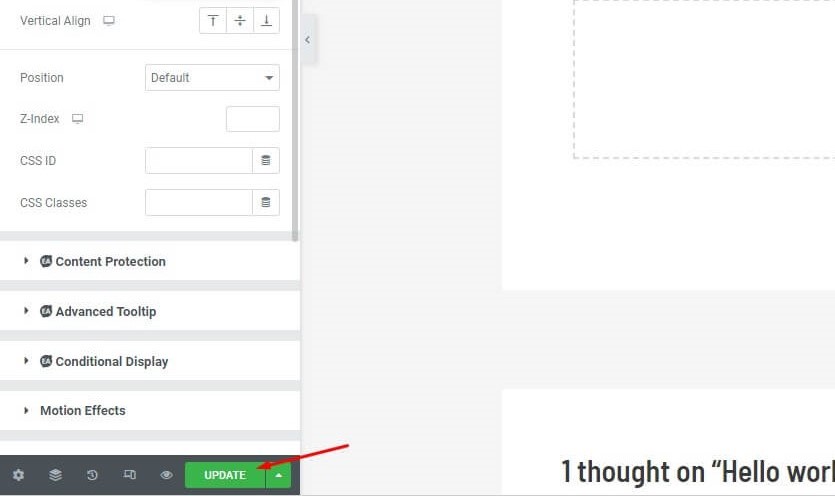
Once you’ve set the container width, make sure to save your changes. You can do this by clicking on the “Publish” or “Update” button in the bottom right corner of the Elementor editor.

-
In conclusion, setting the container width in Elementor for your WordPress site is a simple process that can help you create a responsive design that looks good on any screen size. Whether you choose a fixed width, a percentage of the screen width, or full width, the container width setting in Elementor gives you full control over the appearance of your website. With just a few clicks, you can easily set the container width and make your WordPress site look great on any device.


