Contact Form 7 is a popular plugin for WordPress websites that allows you to create and manage contact forms easily. Setting up Contact Form 7 is a straightforward process, and in this blog, we will walk you through the steps to get it up and running on your website.
-
Install Contact Form 7
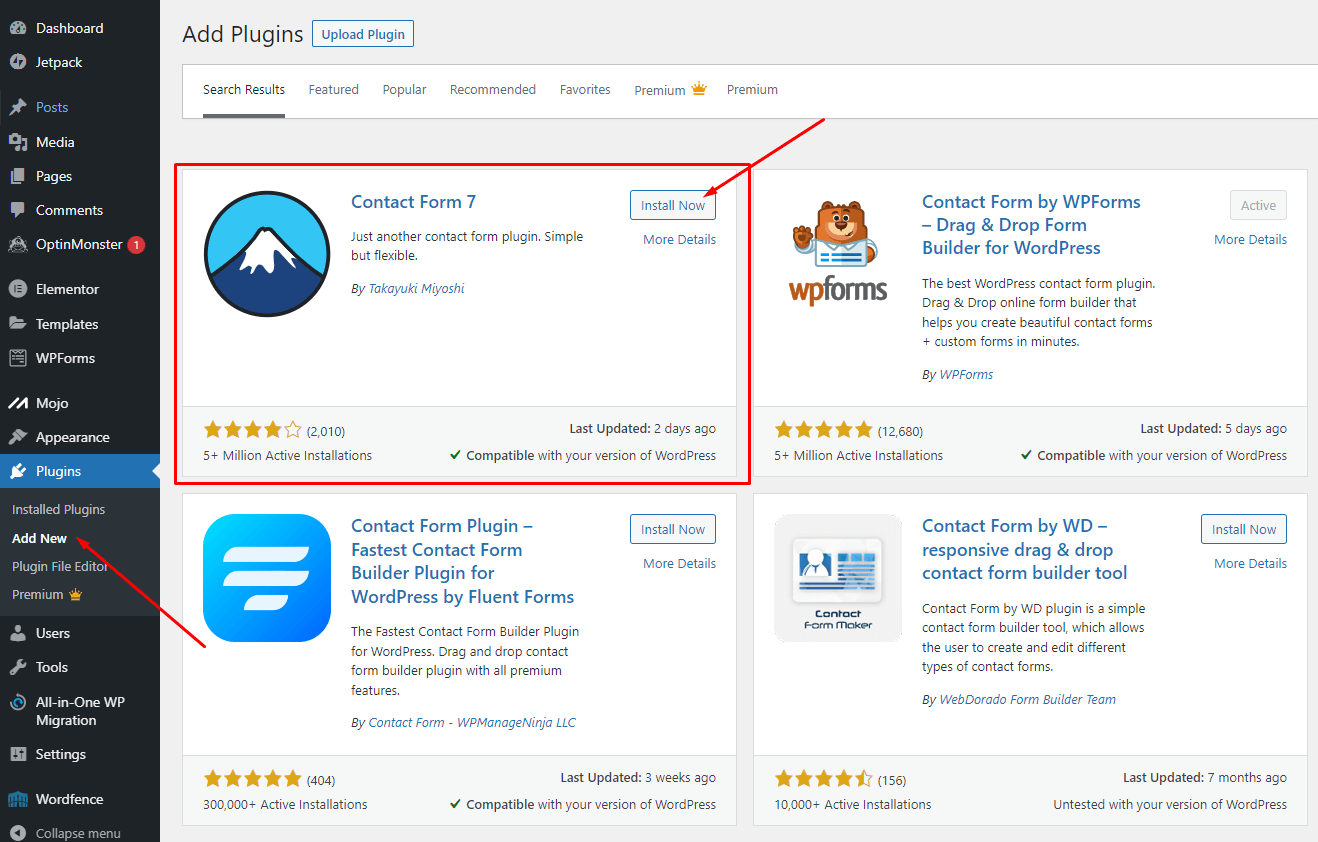
To start, log into your WordPress website, and go to the “Plugins” section. Click on “Add New” and search for Contact Form 7. Once you have found it, click “Install Now” and then “Activate”.
-
Create a Contact Form
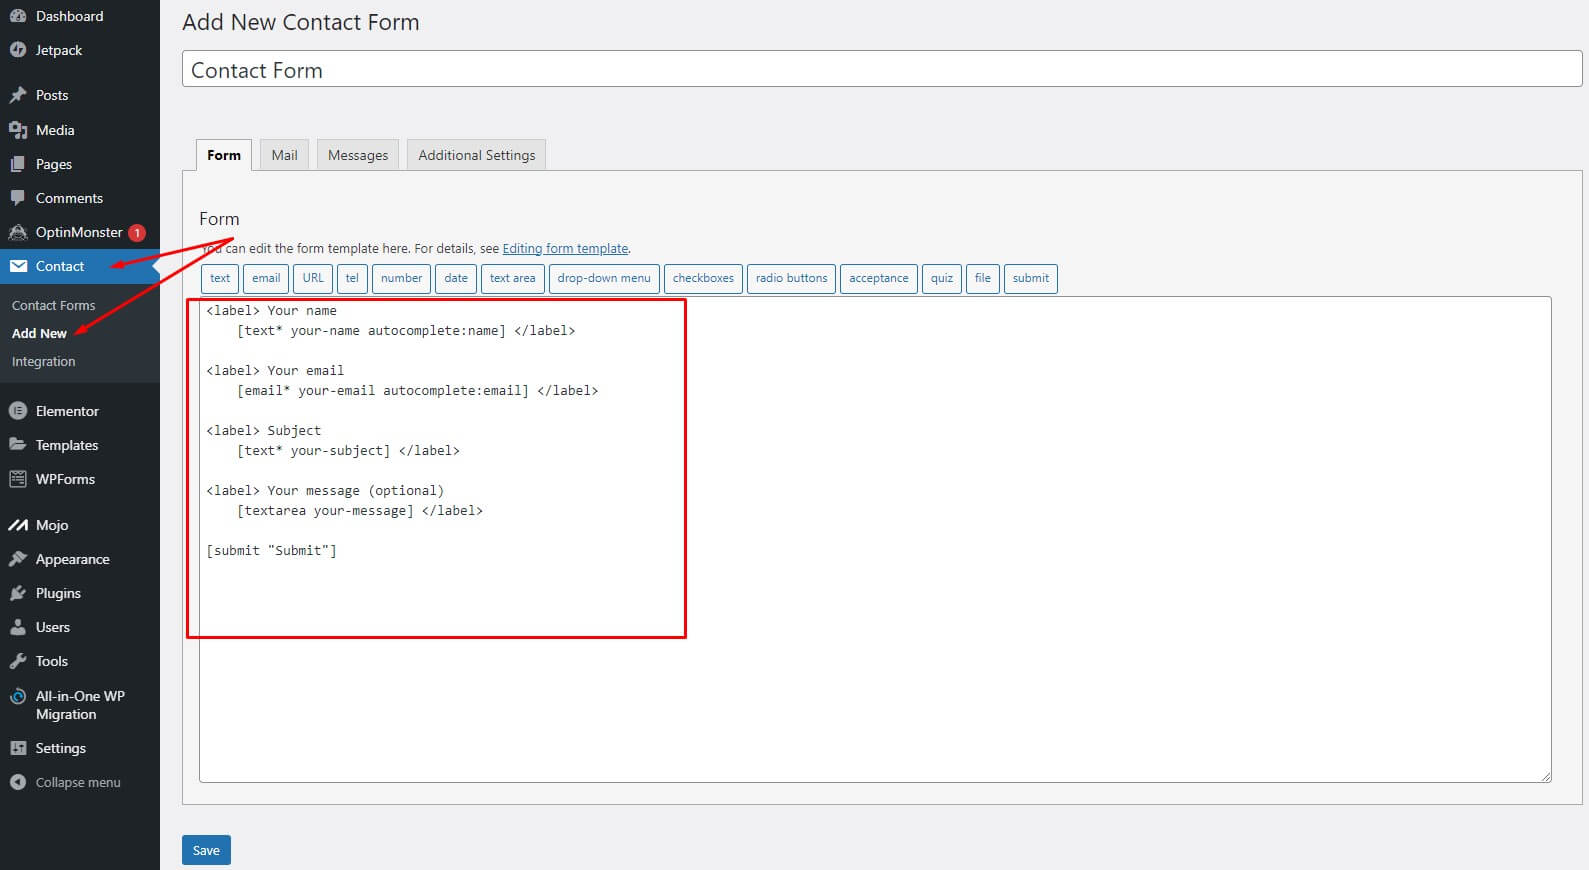
Next, go to the “Contact” section in your WordPress dashboard, and click on “Contact Forms”. Then, click on “Add New” to create a new form. You will be taken to the form editor, where you can customize your form by adding fields, such as name, email, and message.
-
Customize Your Form
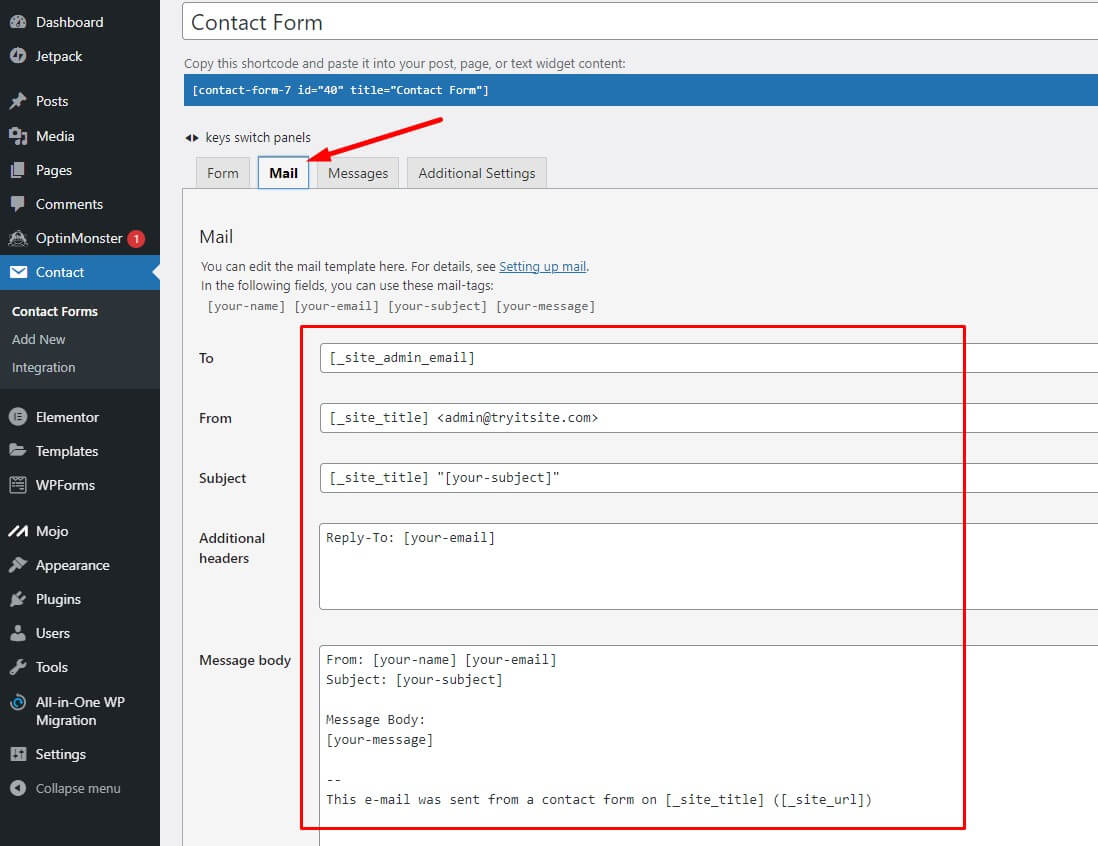
Contact Form 7 comes with a range of options for customizing your form. You can add, remove or rearrange fields, add custom validation, and choose which email address you want to receive form submissions.
-
Add the Form to Your Website
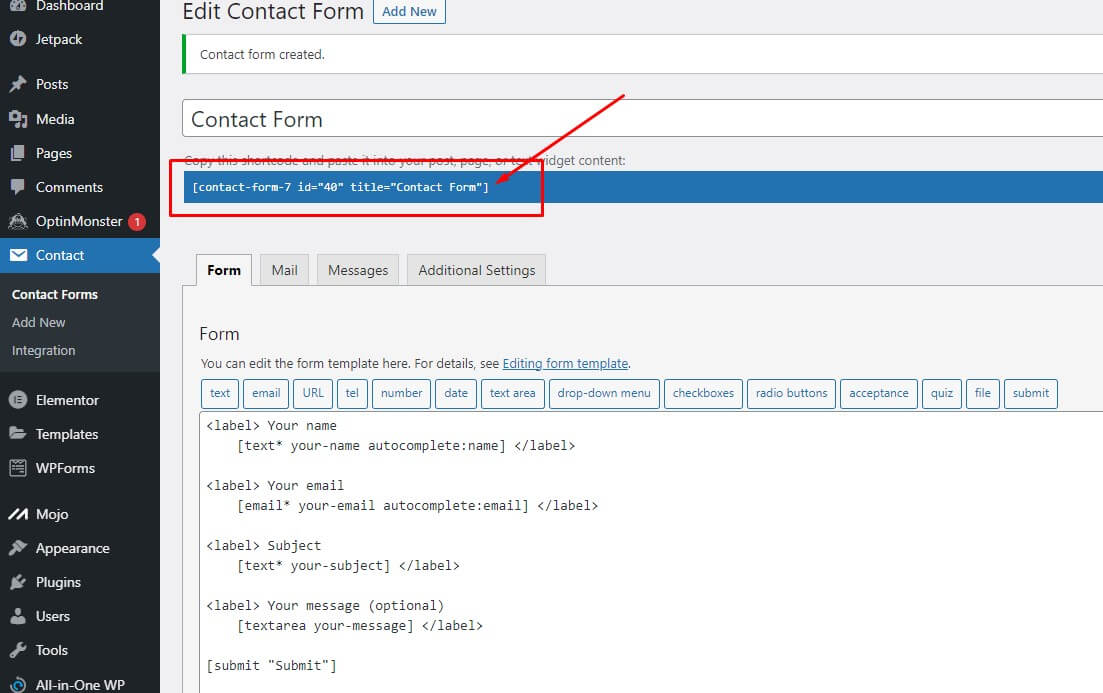
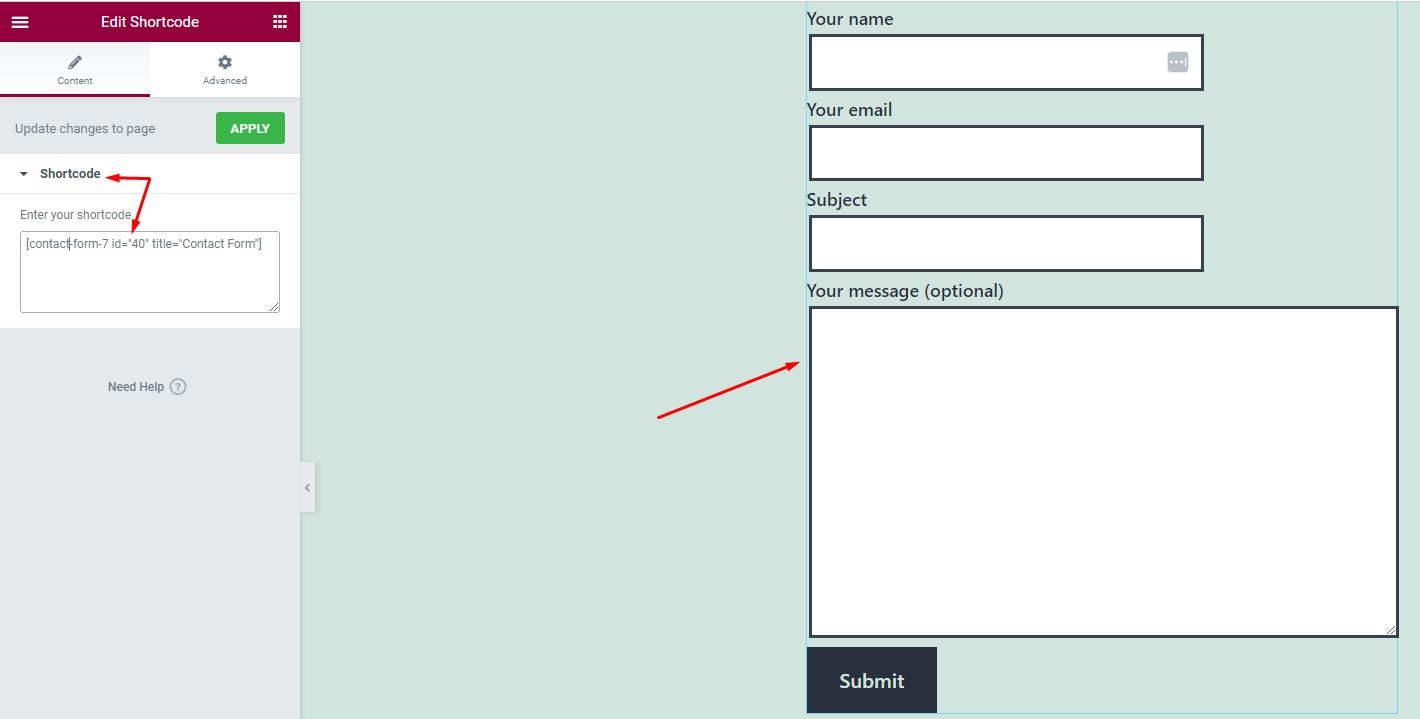
Once you have created and customized your form, it’s time to add it to your website. To do this, you need to copy the Shortcode provided by Contact Form 7 and paste it into a page or post on your website.
-
Test Your Form
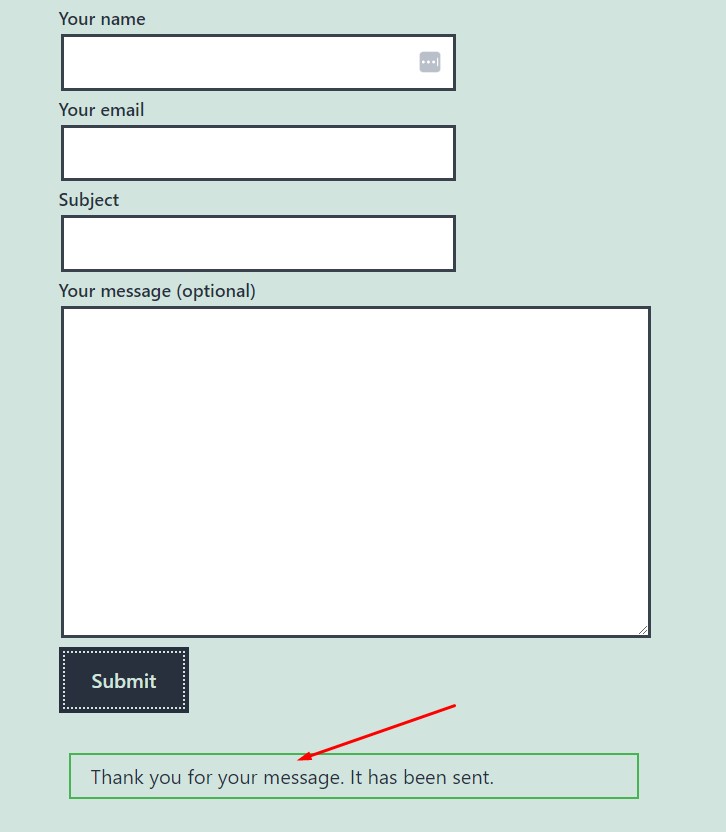
Finally, it’s important to test your form to make sure everything is working as it should. Fill in the form fields and submit it to see if you receive an email notification. If everything is working correctly, your form is now ready for use!
In conclusion, setting up Contact Form 7 on your WordPress website is quick and easy. By following these simple steps, you’ll be able to create a professional and functional contact form in no time. If you encounter any problems, don’t hesitate to reach out to the Contact Form 7 support team for assistance.


